


Scenario Manager - Introduction |
  
|
Scripting is very useful to run tasks automatically but they are not very user friendly and intuitive for users with little knowledge of scripting languages. The Scenario Manager fills this gap. You can use it to add actions (basic scripting functions) into a scenario (a set of actions) and run that automatically, without any knowledge of scripting languages.
The Scenario Manager can be used to run all kinds of tasks automatically:
| • | Change all kinds of model settings and run simulations (experiments) |
| • | Check simulation outputs against pre-defined results (test automation) |
| • | Run simulations and store the results on file (data storage) |
| • | Generate C-code of submodels (code generation) |
When you have a model ready for testing, you can open the Scenario Manager.
| 1. | From the Tools menu select Scenario Manager. |
| 2. | Click on Scenario1. |
Now you will see an empty Scenario Manager with Scenario1 selected:
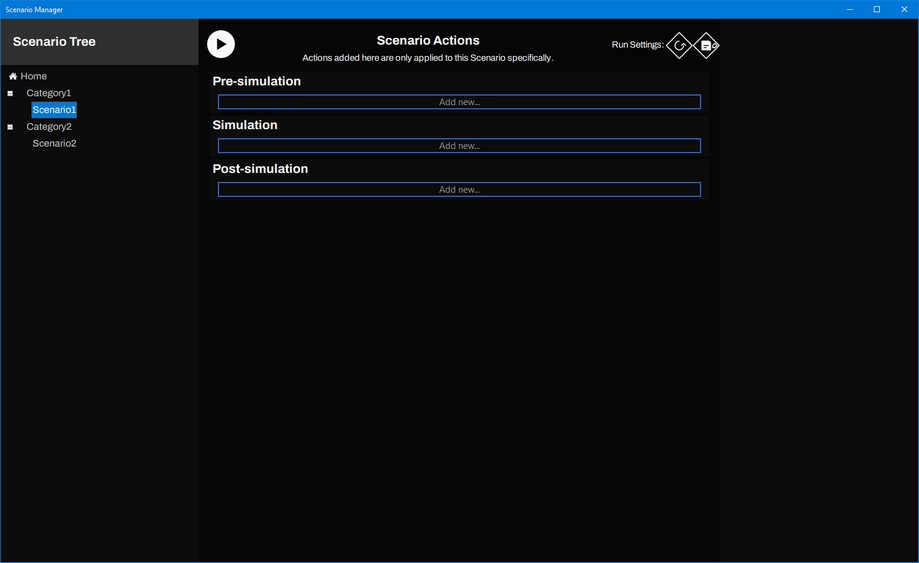
The Pre-simulation bar, Simulation bar and Post-simulation bar allow you to add Actions. Actions in the Pre-Simulation bar will be carried out before the model is simulated. Actions in the Simulation bar will be carried out during a simulation. Actions in the Post-Simulation bar will be carried out after the model is simulated.
| 3. | Click on the Pre-simulation bar, the Simulation bar or the Post-simulation bar to add Actions. |

Under the bar a list of Actions is presented. If you click on an Action, it will be added to the bar.
| 4. | Click on the Action to see its Properties at the right |
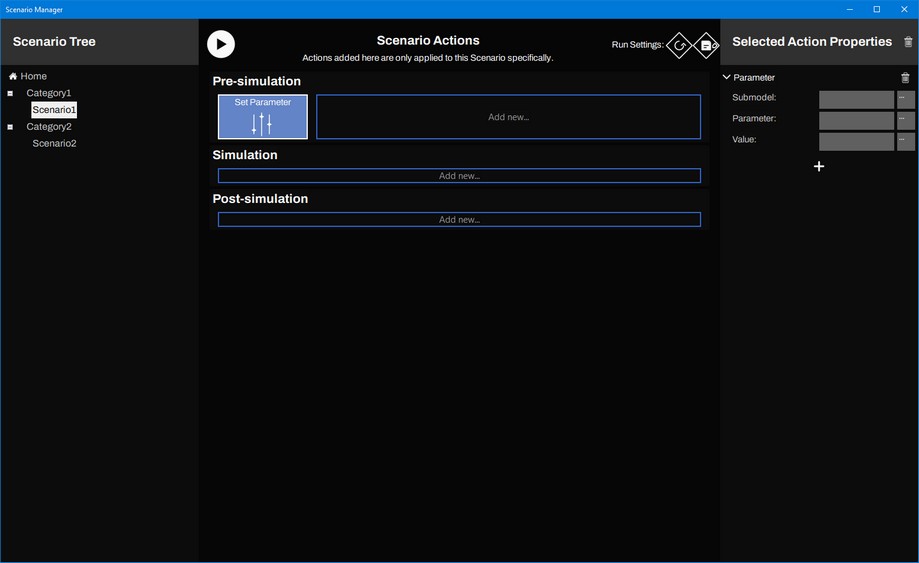
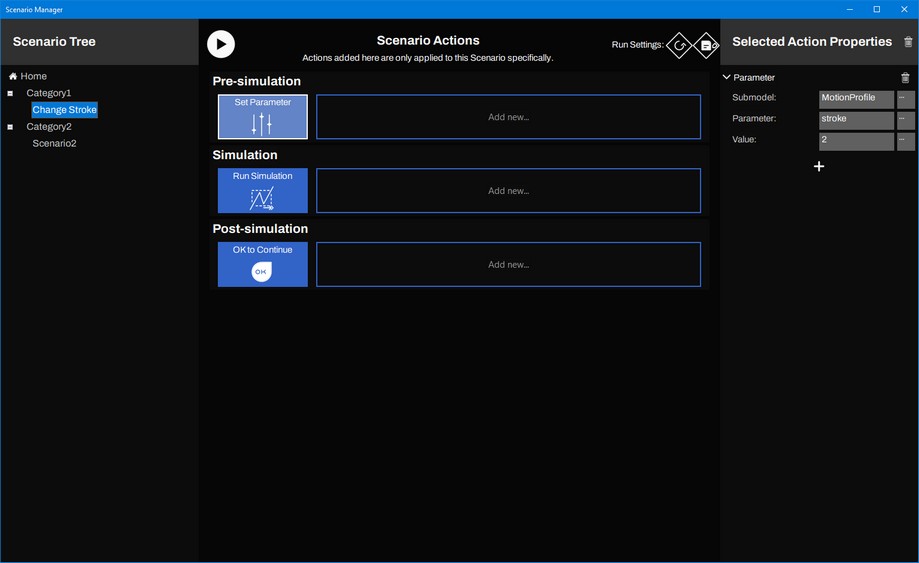
You can set the Properties for the selected Action at the left. If you click on the Recycle Bin button at the top left, the Action will be removed from the bar.
A set of Actions is called a Scenario. You may change the name of the Scenario in the tree at the left. If you select a Scenario in the tree, you can run it by clicking the Play button (white circle with black triangle) at the top middle.
A Category may contain a set of Scenarios. You may change the name of the Category in the tree at the left. If you select a Category in the tree, and click the Play button (white circle with black triangle) at the top middle, all Scenarios in the Category will be run.

As you can see, the Pre-simulation bar, Simulation bar and Post-simulation bar have different color when a Category is selected. If you add an Action, this action will be present for all Scenarios under the Category. This is very useful if you have Actions that have to repeat for every Scenario.
To learn more about the Scenario Manager:
| 1. | Run the example model to see how it all works. |
| 2. | See which Actions can be used. |
| 3. | Inspect the results of an Action, using the logs. |
| 4. | Reset the changes made during a Scenario. |
| 5. | See where the Scenarios are stored on file. |
You can use the Scenario Manager for a number of tasks. Here are some examples:
| 1. | Run a simulation a number of seconds: You can run a simulation for a certain time by executing the Modules: Start Simulation - Wait for seconds - Stop Simulation. |
| 2. | Compare a simulation output with a previously recorded output: You can log a variable during a simulation with the module Log Variables, store it in a .csv-file with the Module Generate CSV and then use the Module Compare CSV to compare this value with a previously recorded value. |
| 3. | Unit Testing: Insert a model from a library with the Update Submodel Module and then run a test. |
| 4. | Parameter Sweep: Set a parameter value and compare the simulation output with a previous run. |
| 5. | Test Automation: Defined the desired output of a simulation run and compare this with the real simulation output using an Assert model. |
| 6. | Change all kinds of model settings and run simulations (experiments) |
| 7. | Check simulation outputs against pre-defined results (test automation) |
| 8. | Run simulations and store the results on file (data storage) |
| 9. | Generate C-code of submodels (code generation) |