


|
Navigation: Installation > Installing 20-sim |
  
|
20-sim can be downloaded from the website www.20sim.com. This is an installation file that installs 20-sim on your computer. The first 4 steps are the same for all users. Depending on the type of license (single, floating) you have to follow different steps to activate 20-sim.
| 1. | Download and Install 20-sim on your computer. |
| 2. | During the installation you will be asked to install the (optional) Python 3.7 package. We recommend to keep the default setting: Yes. |
| 3. | Start 20-sim (from the Windows Start Menu choose 20-sim 5.1). |
If a valid license of 20-sim 5.1 was activated previously, the program will start automatically. If you have not installed 20-sim before, the License Activation dialog will open:
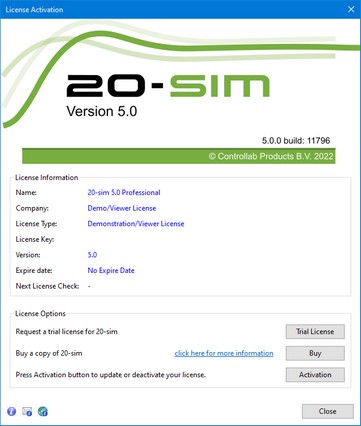
20-sim License Activation Dialog.
| 4. | If you have a valid license key or license file, press the Activation button to enter your license key or browse for the license file. |
If you do not yet have a valid license, press the Trial License button request an trial license or press the Buy button to purchase a license. If you want to continue in Viewer mode (no saving), simply close the dialog without activating 20-sim.
| 5. | Select the type of license you have and who will use it. |
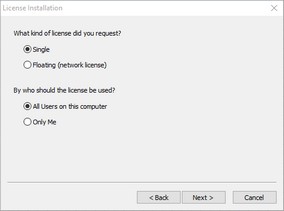
License installation dialog.
If you are using a single license, you will need to enter a license key or license file.
| 6. | On the next dialog box, select I received a license key by e-mail and enter the key in the next dialog. If you have received a license file, enter the location of the license file. |

Single License dialog.
You will be asked to confirm (click Activate Now) and the activation will be performed. After successful activation, the new license will be presented in the License Information dialog.

Web Activation dialog.
If you are using a license that is shared by multiple users (floating license, also known as concurrent license or server license), you must enter the license key that you received and a location on the server (a normal Windows shared folder). This location on the server should be accessible to all users and have read/write permissions. The floating license will be stored in the selected location.
| 6. | In the next dialog box, select First Installation and then enter the license key and the location on the server (Windows share). |
A license file called 20sim.lic will be installed in the location you specified. Remember the location of this file as each new user of 20-sim will have to enter it. You will be asked to confirm (click Activate Now) and activation will be performed. After a successful activation, the new license will be displayed in the License Information dialog.
If you are using a floating license that has already been installed, you will need to specify the location of the license file.
| 7. | In the next dialog, select Administrator already installed server license and then enter the license location (the location of the file 20sim.lic). |
Once you have successfully entered the location of the license file, the License Information dialog will display the new license.