Introduction
Cams and mechanisms are all based on the same principle. The motion of an input axis is transformed to an output axis or translation. The transformation is a function of the input angle. This function is called the cam motion profile.

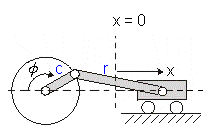
The 20-sim cam wizard helps you to generate cam and mechanism models. You can use various types of motion profiles which are continuous in velocity, acceleration or even in jerk! An example of a mechanism that can be generated by the Cam wizard is the crank-rod mechanism, where a rotary input motion is transformed to a translating output motion.
The models that are generated by the 20-sim Cam wizard are fully dynamic! This means:
| • | The models describe the output velocity as function of the input velocity but also the input torque as function of the output load. |
| • | The speed of the input axis does not have to be constant nor does the output load. |
| • | No inertia, stiffness or other dynamic behavior is included, but this can be easily incorporated by coupling elements from the 20-sim library (inertias, springs etc.) to the input or output of the model. |
Example
To generate a cam or mechanism model in 20-sim, follow the next steps.
| 1. | Open the 20-sim model library an go to the section Iconic Diagram\Mechanical\Rotation\Gears and drag the model Cam-Wizard.emx to the editor. You can also select in the Editor: Tools - Mechatronics Toolbox - Cam Wizard. |
| 2. | Select the Cam-Wizard model and click Go Down. Now the wizard will be opened. |

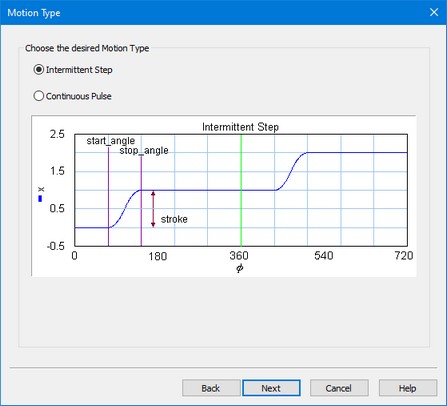
| 5. | Select the type of cam motion profile: |
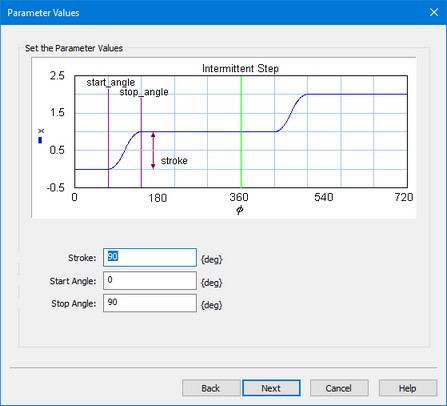
| 6. | Enter the parameters values (Stroke, Start Angle Stop Angle). If you have chosen a continuous pulse as output, you must also enter the values for the Return Angle and End Angle: |
| 7. | In the last page, the resulting values are shown: |
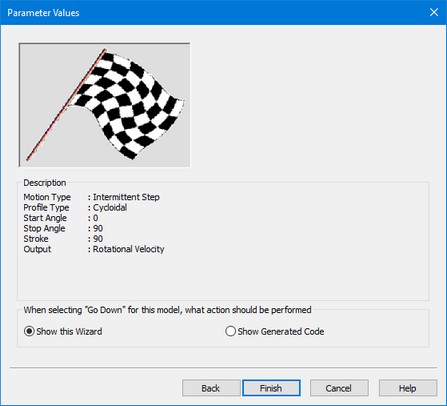
| 8. | Click Finish and the cam model will be defined. All you have to do is to connect the input axis (p_in, rotation) and the output axis (p_out, rotation or translation) of the cam model. |
Note
| 1. | If you have changed the settings of this wizard, you have to process the model first (from the Model menu, choose Check Complete Model) before the changes become effective. |
| 2. | You can change parameter values during simulation (from the Properties menu select Parameters). |
| 3. | This is a masked model that uses the dll-file MotionProfile.dll to open the wizard. This dll-function must be stored in the bin directory of 20-sim. To see the SIDOPS code of a masked model press the shift-key, while clicking the Go Down command. |


