


|
Navigation: Toolboxes > Animation Toolbox > 3D Animation > 3D Animation Properties |
  
|
The 3D Properties window allows you to define the various objects that should be shown in a 3D Animation. The 3D Properties window can be opened, by double clicking the mouse pointer in the Animation window or using the Plot Properties menu.

The 3D Animation Properties window at start-up.
The menu of the 3D Animation Properties consists of three parts.
| • | The Edit menu allows you to create and edit objects. |
| • | The Properties menu allows you to set the General Properties. |
Two lights and five cameras are standard available when you start a new animation. You can delete or change these lights and cameras or add new additional lights and cameras. Inserting new objects can be done with the Edit menu by selecting the Insert Object command.
The left side of the 3D Animation Properties window shows tree-like listing of the objects that are inserted. All objects are defined with respect to a reference frame. This can be done hierarchically by inserting new reference frames.
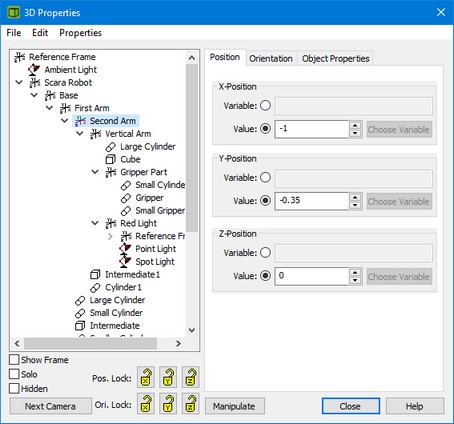
The 3D Animation Properties window of the model ScaraRobot.emx.
On the right side of the 3D Animation Properties window shows the attributes of a selected object (e.g. position, orientation, scaling etc.). Objects can be selected, by clicking the mouse pointer on top of the object in the objects tree.
Each object has an object attached reference frame. This frame can be shown by selecting the object and clicking the Show Frame option. This is useful for manipulating objects. If you press the Control button while selecting the Show Frame option, all frames in the current branch are shown. Do the same for the top reference frame to quickly show or hide all reference frames.
Click the Solo option, to hide all other objects. This is useful for manipulating a single object. If you press the Control button while selecting the Solo option, all objects in the current branch are shown. Do the same for the top reference frame to quickly show or hide all objects.
Click the Hidden option, to hide a single object. This is useful for manipulating a the other objects. If you press the Control button while selecting the Hidden option, all objects in the current branch are hidden. Do the same for the top reference frame to quickly hide or show all objects.
Click the Next Camera button to seen the next camera view.
Click the Manipulate button to move an object with use of your mouse.