


|
Navigation: Installation > Installing 20-sim |
  
|
20-sim can be downloaded from the website www.20sim.com. This is an installation file that will install 20-sim on your computer. The first 4 steps are equal for all users. Depending on the type of license (single, floating) you have to follow different steps to activate 20-sim.
| 1. | Download and Install 20-sim on your computer. |
| 2. | During Installation you will be asked to install the (optional) Python 3.7 package. We advise to keep the default setting: Yes. |
| 3. | Start 20-sim (from the Windows Start Menu choose 20-sim 5.1). |
If a valid license of 20-sim 5.1 was activated before, the program will start automatically. If you have not installed 20-sim before, the License Activation dialog will open:
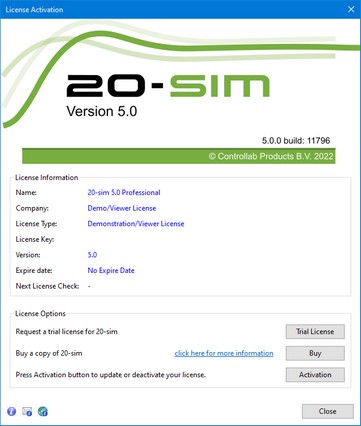
20-sim License Activation Dialog.
| 4. | If you have a valid license key or license file, press the Activation button to enter your license key or browse for the license file. |
If you do not yet have a valid license, press the Trial License button request an trial license or press the Buy button to purchase a license. If you want to continue in Viewer mode (no save functionality), just close the dialog without activating 20-sim.
| 5. | Select which kind of license you have and who should use the license. |
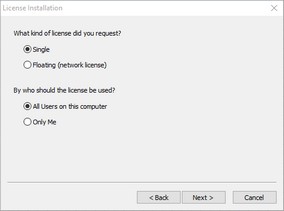
License installation dialog.
If you are using a single license, you have to enter a license key or license file.
| 6. | On the next dialog, select I received a license key by e-mail and enter the key in the next dialog. When you received a license file, you have to enter the location of the license file. |

Single License dialog.
You will be asked for confirmation (click Activate Now) and activation will be carried out. After a successful activation process the License Information dialog will show the new license.

Web Activation dialog.
If you are using a license that is shared by more users (floating license, also known as concurrent license or server license), you have enter the received license key and a location on the server (a normal Windows shared folder) first. This location on the server should be accessible to all users and have read/write permission. The floating license will be stored at the selected location.
| 6. | On the next dialog, select First Installation and then enter the license key and the location on the server (Windows share). |
On the location that you have given, a license file 20sim.lic will be installed. Remember the location of this file because every new user of 20-sim will need to enter it. You will be asked for confirmation (click Activate Now) and activation will be carried out. After a successful activation process the License Information dialog will show the new license.
If you are using a floating license that was already installed you have to enter the location of the license file.
| 7. | On the next dialog, select Administrator already installed server license and then enter the license location (the location of the file 20sim.lic). |
After a successful entry of the location of the license location, the License Information dialog will show the new license.